Why You’ll Love this Sweet Potato Slices Recipe
Why will you love this Garlic-Glazed Sweet Potato Slices recipe? First off, it’s incredibly easy to whip up. Just grab a few sweet potatoes and some garlic, and you’re on your way to a delicious side dish.
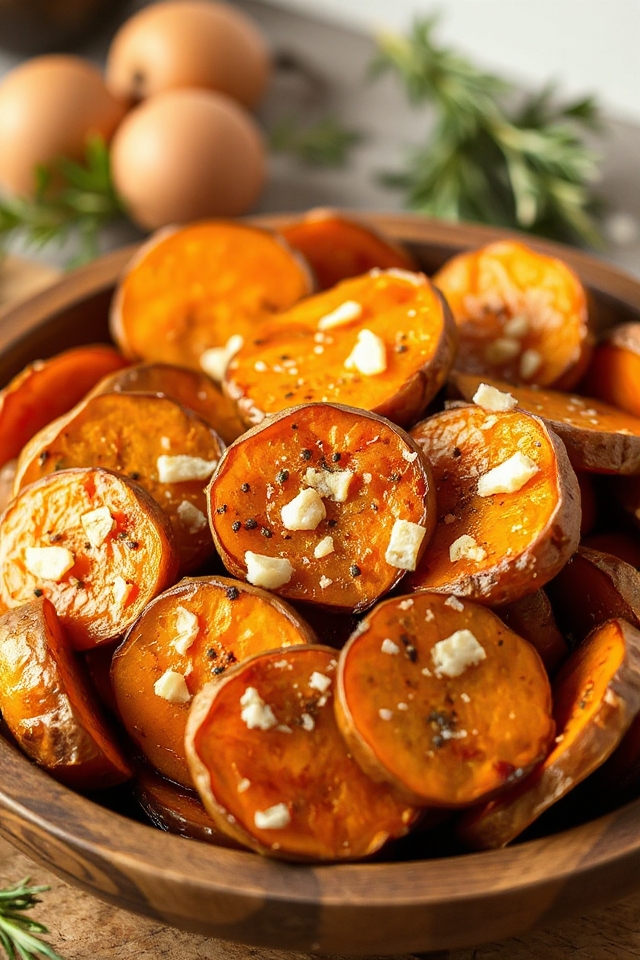
The blend of savory garlic and the natural sweetness of the potatoes creates a flavor explosion that’ll leave you wanting more. Plus, the crispy edges paired with a tender inside make every bite satisfying.
I love how versatile this dish is; it pairs well with almost anything—whether it’s grilled chicken or a hearty salad.
And let’s not forget, it’s a healthier alternative to fries! Trust me, once you try it, you won’t be able to resist making it again and again.
Ingredients of Sweet Potato Slices
When it comes to whipping up a tasty side dish, garlic-glazed sweet potato slices are a total game-changer. Not only are they super easy to prepare, but they also deliver a delightful blend of flavors that makes your taste buds dance.
Just think about it: the savory aroma of garlic wafting through your kitchen, combined with the sweet, caramelized edges of the potatoes. It’s a match made in culinary heaven. And the best part? You probably already have most of these ingredients in your pantry.
So, let’s plunge into what you’ll need to create this mouthwatering dish.
Ingredients for Garlic-Glazed Sweet Potato Slices:
- 3-4 regular sized sweet potatoes
- 2 tablespoons canola oil
- 2 tablespoons chopped garlic (in either water or oil)
- 2 teaspoons brown sugar
- 2 teaspoons fresh ground black pepper
- 1 teaspoon kosher salt
Now, let’s talk about the ingredients a bit more. Sweet potatoes are the star of the show, obviously. They’re not just pretty to look at; they’re also packed with nutrients and fiber.
When you pick them out, aim for ones that are firm and free of blemishes. And garlic? Well, you can never go wrong with garlic. It adds depth and flavor, making everything taste just a little bit more gourmet.
The brown sugar is a nice touch, giving that perfect hint of sweetness that balances out the savory notes. Just be careful with the pepper and salt; you can always add more later, but it’s harder to fix an overly salty dish.
How to Make Sweet Potato Slices
Making garlic-glazed sweet potato slices is a breeze, and trust me, once you try them, you’ll want to whip them up again and again. First off, let’s get that oven preheated to a sizzling 425 degrees.
While it’s warming up, take 3 to 4 regular-sized sweet potatoes and give them a good peel. I always find peeling sweet potatoes to be an oddly satisfying task, like I’m revealing a hidden treasure. Once they’re all naked, slice them into even rounds, about a quarter-inch thick. The thickness is key here; if they’re too thick, they’ll take forever to cook, and if they’re too thin, they might just turn into crispy chips.
Next, grab a sturdy ziplock bag—yes, the kind that seals up tight—and toss in your sweet potato slices. Now let’s get those flavors going. Add 2 tablespoons of canola oil, 2 tablespoons of chopped garlic (whether in water or oil, you do you), 2 teaspoons of brown sugar, 2 teaspoons of fresh ground black pepper, and 1 teaspoon of kosher salt.
Seal that bag up and give it a good shake. You want every slice to be coated in that delicious garlicky goodness. It’s like a mini dance party for the sweet potatoes in there, and who doesn’t love a little shimmy?
Once they’re well-coated, it’s time to spread the slices out on a cookie sheet. If you want to make cleanup easier, you might want to line the sheet with aluminum foil first—just don’t forget to spray it with Pam so nothing sticks.
Lay out those slices in a single layer, making sure they’re not overlapping. That’s the secret to getting them nice and crispy. Pop that sheet into the oven and let them bake for about 30 to 40 minutes. Remember to flip them every 10 minutes; it’s kind of like giving them a little love tap to guarantee they cook evenly.
When they come out, you’ll have beautifully glazed sweet potato slices that are tender on the inside and slightly caramelized on the edges. Trust me, they’ll be the star of your dinner table.
Sweet Potato Slices Substitutions & Variations
While the garlic-glazed sweet potato slices are fantastic on their own, there are plenty of substitutions and variations you can try to mix things up. For a twist, swap sweet potatoes for butternut squash or parsnips; they’ll give you a different flavor profile.
If you want a spicy kick, add some cayenne pepper or chili flakes to the mix. Instead of brown sugar, try maple syrup or honey for a natural sweetness.
You can also experiment with herbs—rosemary or thyme work wonderfully with garlic. For a nutty flavor, sprinkle some toasted sesame seeds on top before baking.
These simple changes can elevate your sweet potato slices and keep your meal exciting! Enjoy the creativity in your kitchen!
What to Serve with Sweet Potato Slices
After experimenting with various substitutions for your garlic-glazed sweet potato slices, you might be wondering what to pair them with for a complete meal.
I love serving these delicious slices alongside grilled chicken or salmon; the flavors complement each other beautifully. A fresh green salad with a tangy vinaigrette adds a nice crunch and balances the sweetness of the potatoes.
If you’re in the mood for something heartier, try pairing them with quinoa or couscous mixed with roasted veggies. For a cozy vibe, I often serve them with a warm lentil soup.
Don’t forget a sprinkle of feta or goat cheese on top for extra flavor! These combinations create a satisfying and well-rounded meal that everyone will enjoy.
Additional Tips & Notes
To guarantee your garlic-glazed sweet potato slices turn out perfectly, I recommend keeping an eye on the baking time, as it can vary based on the thickness of your slices.
If you prefer a bit more caramelization, feel free to leave them in the oven for a few extra minutes.
Also, don’t hesitate to customize the seasoning; adding a pinch of cayenne pepper can give it a nice kick.
If you want a crispier texture, try broiling them for the final couple of minutes, but watch closely to prevent burning.
Finally, storing any leftovers in an airtight container in the fridge allows for easy reheating.
Enjoy experimenting with flavors and textures to find your perfect combination!